First, what even is a splash screen? It’s a screen that commonly displays some form of app branding, usually in the form of a logo, slogan, or the brand’s colors. The splash screen tends not to be very complicated because you want it to load fast. After all, the splash screen serves as the UI the user sees while the system loads up the app’s actual UI and any other resources your app requires.
I’ll show you the wrong approach and then walk you through implementing the official Android approach to handling a splash screen, which we’ve had access to for a few years. You’ll learn the downside to the custom solution, what you need to be aware of when choosing this approach related to the latest Android versions, and what you can achieve with the official Android splash screen API. I’ll also share some tips when your project requires a custom splash screen solution.
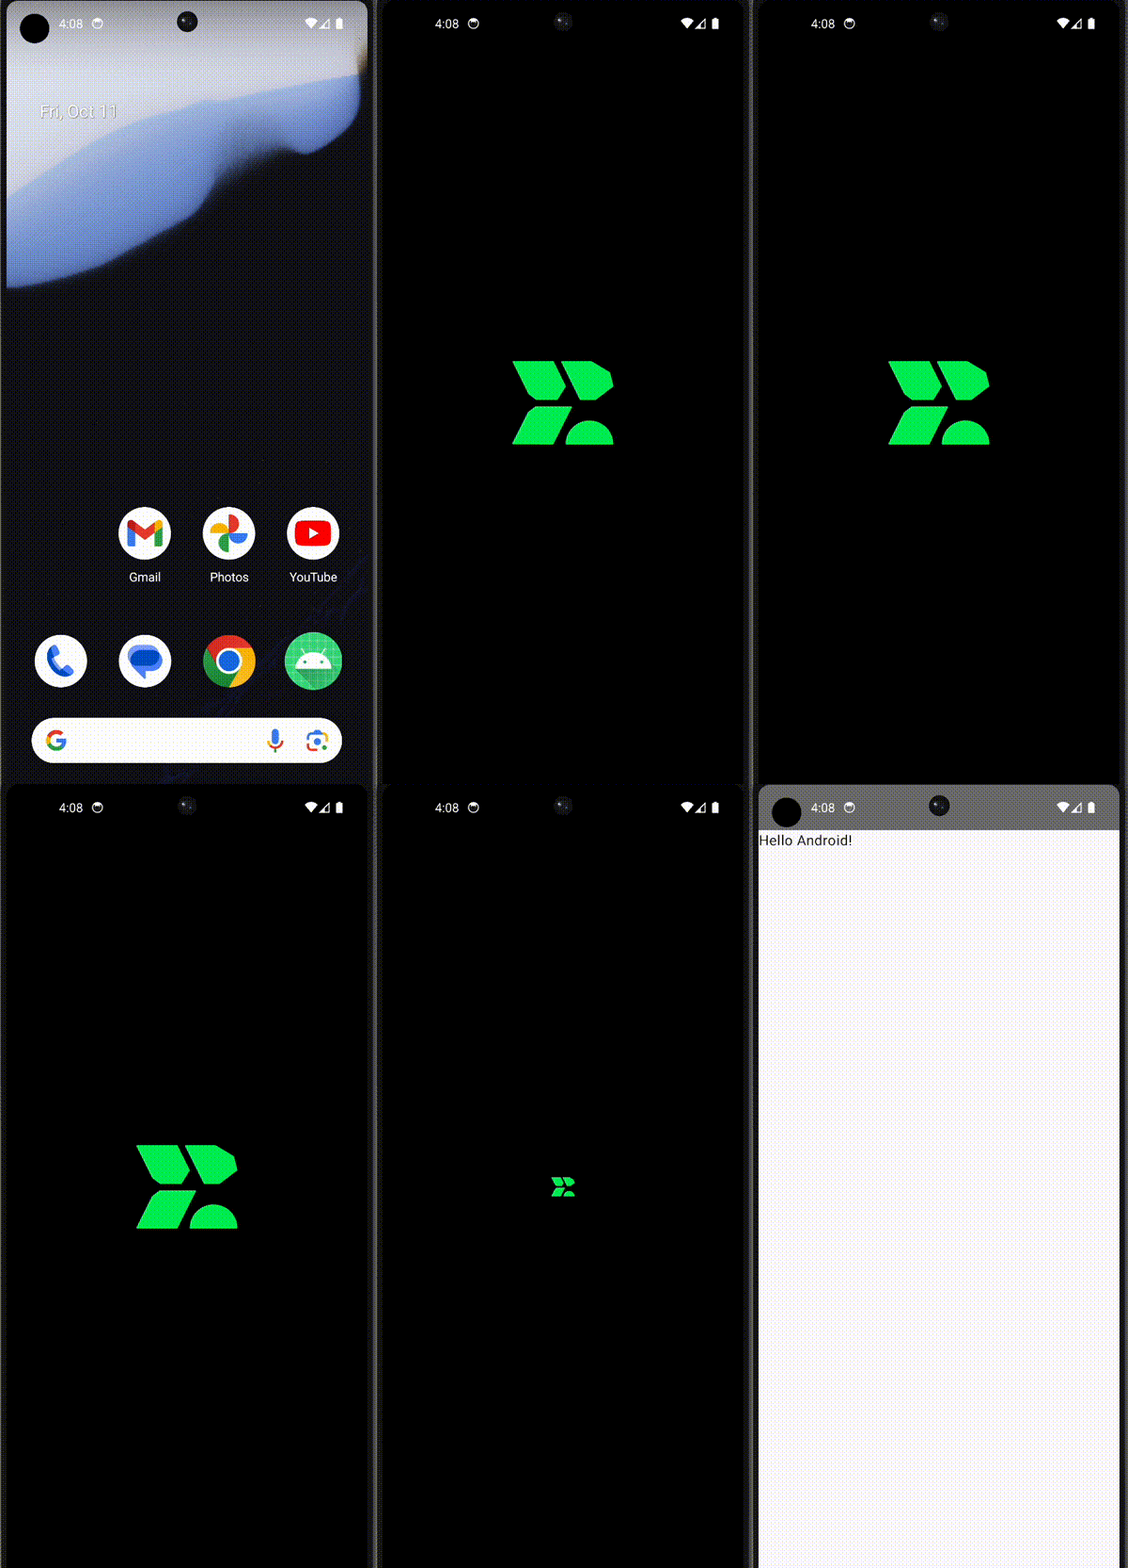
Take a look at the following splash screen animation that can be achieved using the official Android splash screen API:

Wrong Approach – Custom Splash Screen Solution
If you ever had to implement a splash screen on Android, you might be familiar with creating a separate screen, like any other in your app. Whether this was a separate Activity, Fragment, or even Composable, it had a similar structure to this:
val navController = rememberNavController()

NavHost(
    navController = navController,
    startDestination = SplashRoute
) {
    composable<SplashRoute> {

        LaunchedEffect(Unit) {
            // Simulate some preparation needed before showing UI
            delay(3000)
            navController.navigate(HomeRoute)
        }

        Box(
            modifier = Modifier
                .fillMaxSize()
                .background(Color.Black),
            contentAlignment = Alignment.Center
        ) {
            Image(
                painter = painterResource(id = R.drawable.logo),
                contentDescription = "App Logo",
                modifier = Modifier.size(100.dp)
            )
        }

    }

    composable<HomeRoute> {
        Surface(
            modifier = Modifier.fillMaxSize(),
            color = Color.White
        ) {
            Text(text = “Home")}
        }
    }
}
You can read more in-depth about Jetpack Compose Type-Safe Navigation in one of our articles: How to Implement Official Type-Safe Navigation With Jetpack Compose & Custom Types
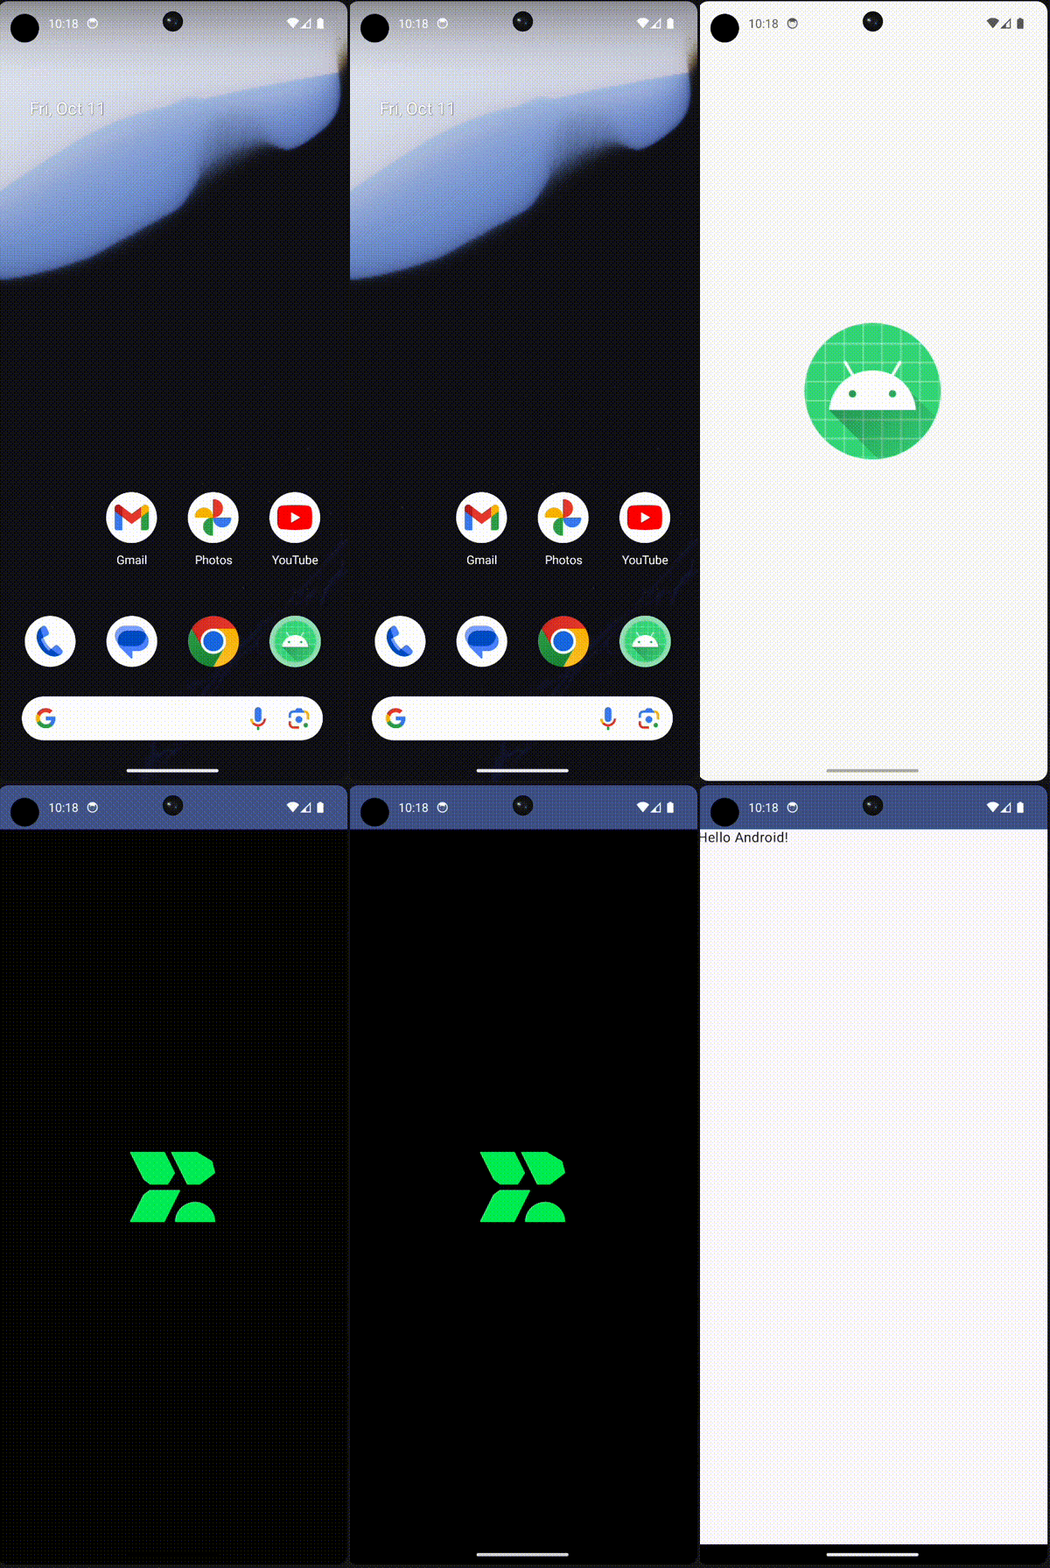
This approach is wrong because you could show your user two splash screens.

For apps that run on Android 12 or later, the system will, by default, show its own splash screen (which defaults to your app’s logo), which results in a double splash screen—not a great experience for your users.
The Android splash screen on Android 12 and above can’t be disabled.
Using the Official Android Splash Screen Solution
Now, let´s see how we can address this double splash screen issue by working with the Android system to customize the default splash screen it shows. Below, you can find the dependency that we need to include in our project:
[versions]
splashscreen = "1.0.1"

[libraries]
androidx-core-splashscreen = { group = "androidx.core", name = "core-splashscreen", version.ref="splashscreen"}
After performing a Gradle sync, we can add the logo we want to display. To add one to your project, right-click your drawable folder and select New -> Vector Asset. Name it “logo,” once it’s been imported, you can find the new logo.xml file in your res/drawable folder.
Android has some sizing requirements for the logo to fit in the space allocated in the splash screen. If it is larger, it will be cropped, so take care to ensure your logo is not too large.
The logo.xml file consists of a collection of paths that form a vector. Each path consists of multiple points connected by a solid line and optionally filled with a color. After the import, you might not have the group tag in your file. Add this tag to group all the paths that make up your logo. Now, we can use the group tag to define the center point of our drawable. This is important because it will be where any transformations, like scaling and rotation, to the logo will be performed. By default, this point is in the far top left corner of the drawable, which is not usually what you’d want. To specify this point on our logo, we can use the pivotX and pivotY properties on our group tag that allow you to specify the X and Y coordinates of the center point of the logo.
The center point of the drawable is half of the viewPortHeight and viewPortWidth properties defined in the parent vector tag in the logo.xml file.
This information will be relevant when we want to animate this logo.
<vector
    xmlns:android="http://schemas.android.com/apk/res/android"
    android:height="50dp"
    android:width="50dp"
    android:viewportHeight="3500"
    android:viewportWidth="3500">
    <group
        android:name="animationGroup"
        android:pivotX="1750"
        android:pivotY="1750">
        <path android:fillColor="#00f15e"android:pathData="..." />
        <path android:fillColor="#00f15e"android:pathData="..." />
        <path android:fillColor="#00f15e"android:pathData="..." />
    </group>
</vector>
To achieve the logo animation that I’ve shown you at the beginning, we’ll need to create two new files:
logo_animator.xmlfile – describes how we want to animate our logo-
animated_logo.xml– joins our logo and animator together
First, the animation file should be placed in the res/animator folder (you may need to create that folder first).
<?xml version="1.0" encoding="utf-8"?>
<objectAnimator xmlns:android="http://schemas.android.com/apk/res/android"
    android:duration="1000"
    android:interpolator="@anim/overshoot_interpolator">

    <propertyValuesHolder
        android:propertyName="rotation"
        android:valueType="floatType"
        android:valueFrom="0.0"
        android:valueTo="360.0" />

    <propertyValuesHolder
        android:propertyName="scaleX"
        android:valueType="floatType"
        android:valueFrom="0.0"
        android:valueTo="0.4" />

    <propertyValuesHolder
        android:propertyName="scaleY"
        android:valueType="floatType"
        android:valueFrom="0.0"
        android:valueTo="0.4" />

</objectAnimator>
This file’s important parts are that it will perform a rotation (from 0 to 360 degrees) and change the X and Y coordinates to achieve the growth and shrink behavior we want. Each is defined using the propertyValuesHolder tag. The animation will complete within one second, as defined using duration=“1000”. We also specify an interpolator, which will make our animation appear a bit less rigid. Create and add the XML file named overshoot_interpolator.xml inside your res/anim package.
<overshootInterpolator xmlns:android="http://schemas.android.com/apk/res/android">

</overshootInterpolator>
Next, to associate the logo with this animator, we create another XML file, animated_logo.xml, inside res/drawable. In it, we will combine the animator with the logo so that we can use this file in our splash screen, and the animator will apply the animation we defined to our logo. The name attribute of the target tag points to the name property of the group tag in your logo.xml file, so make sure it matches.
<?xml version="1.0" encoding="utf-8"?>
<animated-vector xmlns:android="http://schemas.android.com/apk/res/android"
    android:drawable="@drawable/logo">

    <target
        android:animation="@animator/logo_animator"
        android:name="animationGroup" />

</animated-vector>
The Android splash screen API does not require creating a separate Activity or Composable screen.
Next, let’s replace Android’s default screen. We can do this by defining our own theme inside the themes.xml file.
<?xml version="1.0" encoding="utf-8"?>
<resources>

    <style name="Theme.MyApp" parent="android:Theme.Material.Light.NoActionBar" />

    <style name="Theme.App.Starting" parent="Theme.SplashScreen">
        <item name="windowSplashScreenBackground">@color/black</item>
        <item name="postSplashScreenTheme">@style/Theme.MyApp</item>
        <item name="android:windowSplashScreenAnimatedIcon">@drawable/animated_logo</item>
    </style>
</resources>
Your IDE may give you a warning if your minimum SDK is less than API 31. That is because the android:windowSplashScreenAnimatedIcon property is only supported from API 31 and above. You can use a resource qualifier to only apply this property for versions >= 31.
After defining our theme, we need to go to our Manifest file and set it to our application and main activity.
// Some attributes have been omitted
<application
    android:theme="@tyle/Theme.App.Starting">
    <activity
        android:name=".MainActivity"
        android:theme="@tyle/Theme.App.Starting">
        <intent-filter>
            <action android:name="android.intent.action.MAIN" />

            <category android:name="android.intent.category.LAUNCHER" />
        </intent-flter>
    </activity>
</application>
Moving on from all this XML, let’s call installSplashScreen() in our MainActivity. This function comes from the splash screen dependency we added earlier on. Make sure to call it before setContent { }. If you had to run your app now, you’d see that the splash screen is missing an animation when the splash screen is removed. With Android’s splash screen API, we can create such an exit animation:
installSplashScreen().apply {
    setOnExitAnimationListener { screen ->
        val zoomX = ObjectAnimator.ofFloat(
            screen.iconView,
            View.SCALE_X,
            0.4f,
            0.0f
        )
        zoomX.interpolator = OvershootInterpolator()
        zoomX.duration = 500L
        zoomX.doOnEnd { screen.remove() }

        val zoomY = ObjectAnimator.ofFloat(
            screen.iconView,
            View.SCALE_Y,
            0.4f,
            0.0f
        )
        zoomY.interpolator = OvershootInterpolator()
        zoomY.duration = 500L
        zoomY.doOnEnd { screen.remove() }

        zoomX.start()
        zoomY.start()
    }
}
In the above snippet, we create an ObjectAnimator that will apply a scale animation to our logo to make it appear to shrink in size. We can access our logo by using the SplashScreenViewProvider that we get from the installSplashScreen function and pass it to our ObjectAnimator.
I go into more detail on the logo animation in his video: How to Build an Animated Splash Screen on Android – The Full Guide
Control For How Long The Splash Screen Is Visible For
Our code so far gives us a beautiful custom splash screen shown to the user while the Android system prepares to launch the app. But what if we need to perform some setup or configuration before showing our UI? In this case, the Android splash screen API has a function setKeepOnScreenCondition(), which takes a lambda that will get checked on every frame drawn. When the lambda returns true, the splash screen will be removed, and its exit animation will be executed. A great way to handle this state is by using a ViewModel.
class MainViewModel: ViewModel() {

    /**
     * Using a StateFlow here is also a good option
     *
     *     private val _isReady = MutableStateFlow(false)
     *     val isReady = _isReady.asStateFlow()
     */
    var isReady by mutableStateOf(false)
        private set

    init {
        viewModelScope.launch {
            delay(3000L)
            isReady = true
        }
    }
}
Now we need to create an instance of our MainViewModel and pass our isReady boolean to the setKeepOnScreenCondition lambda as seen below:
//  Some code has been omitted to highlight the important pieces
class MainActivity : ComponentActivity() {

    private val viewModel by viewModels<MainViewModel>()

    override fun onCreate(savedInstanceState: Bundle?) {
        super.onCreate(savedInstanceState)
        installSplashScreen().apply {
            setKeepOnScreenCondition {
                !viewModel.isReady
            }
         }

         setContent { /* ... */ }
    }
}
Splash screens should never be longer than necessary. A user did not open your app to look at your company’s logo, so don’t delay dismissing your splash screen artificially.
Limitations You Should Know About
The official Android splash screen API comes with these limitations:
- It doesn’t allow you to draw outside of the cropped logo circle.
- It doesn’t allow complex animations that go beyond animating alpha & transform.
Think twice about whether a custom solution is worth the downsides of dealing with the system splash screen.
When a custom splash screen is necessary for your project, you’ll need to work alongside Android’s default splash screen on devices running Android 12 and later.
Your option is incorporating the system splash screen with your custom Composable splash screen. You’ll need to ensure the system splash screen smoothly transitions into your custom one without the user noticing. You could for example show the system splash screen with no logo and then start your more complex logo animation when the Composable splash screen is shown. This way, there will be a short time without seeing a logo, but then a more complex logo animation could start.
Conclusion
- A splash screen is a great way to load initial resources, like an auth token, to determine the initial screen of your app.
- Don’t artificially show a splash screen for longer than necessary.
- The Android splash screen API allows you to show a splash screen without defining a separate Activity, Fragment or Composable screen.
- The official Android splash screen API has limitations regarding the complexity of the animation and showing more besides a logo. In my opinion, no app needs more than that, but if you do, make sure your custom Composable splash screen integrates seamlessly with Google’s splash screen API.

Master Building Large-Scale Native Android Apps
Take this 23h online course to learn everything it takes to become an industry-ready native Android developer. Learn about multi-module architecture, Gradle, Jetpack Compose, authentication, offline-first development and more.